Table of Contents
- Learning Their Name
- Uncovering Their Location
- Aggregating the Information
- Generating Icons
- The Windows Side of Things
- Conclusion and Retrospect
If you’re reading this way in the future, please don’t skip the Retrospect section.
Surely I’m not the only one who saw this beauty:
and then got disappointed with this Windows Explorer non-beauty:

I’m sure you have, at some point, wished for this:

Don’t lie, I know you have. I did too and the internet quite surprisingly didn’t provide a solution. So let’s make one.
Learning Their Name
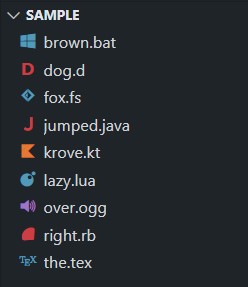
The obvious first step is to find out if there’s a way to extract these icons from VSCode. If you don’t already know about VSCode’s file icon themes. Just like how the regular Color themes dictate VSCode’s color settings (keywords, strings, comments, etc in the editor, terminal, etc), file icon themes dictate the, well, file icons, displayed in the explorer, editor tabs, etc. You can view and change your file icon themes in Settings > File Icon Theme.
![]()
Seti’s the name. Easy first step.
Uncovering Their Location
The next obvious step is to find out where the icons are stored. Because additional file icons are provided as extensions, it makes sense to look there first. VSCode stores its extensions in %USERPROFILE%\.vscode\extensions. with a folder per extension named after its ID.
Turns out there’s no folder for Seti icons, VSCode built-in icons or anything similar. Hmm. Maybe look into VSCode devtools, point to the icon, and see its location (hopefully as .png files)?
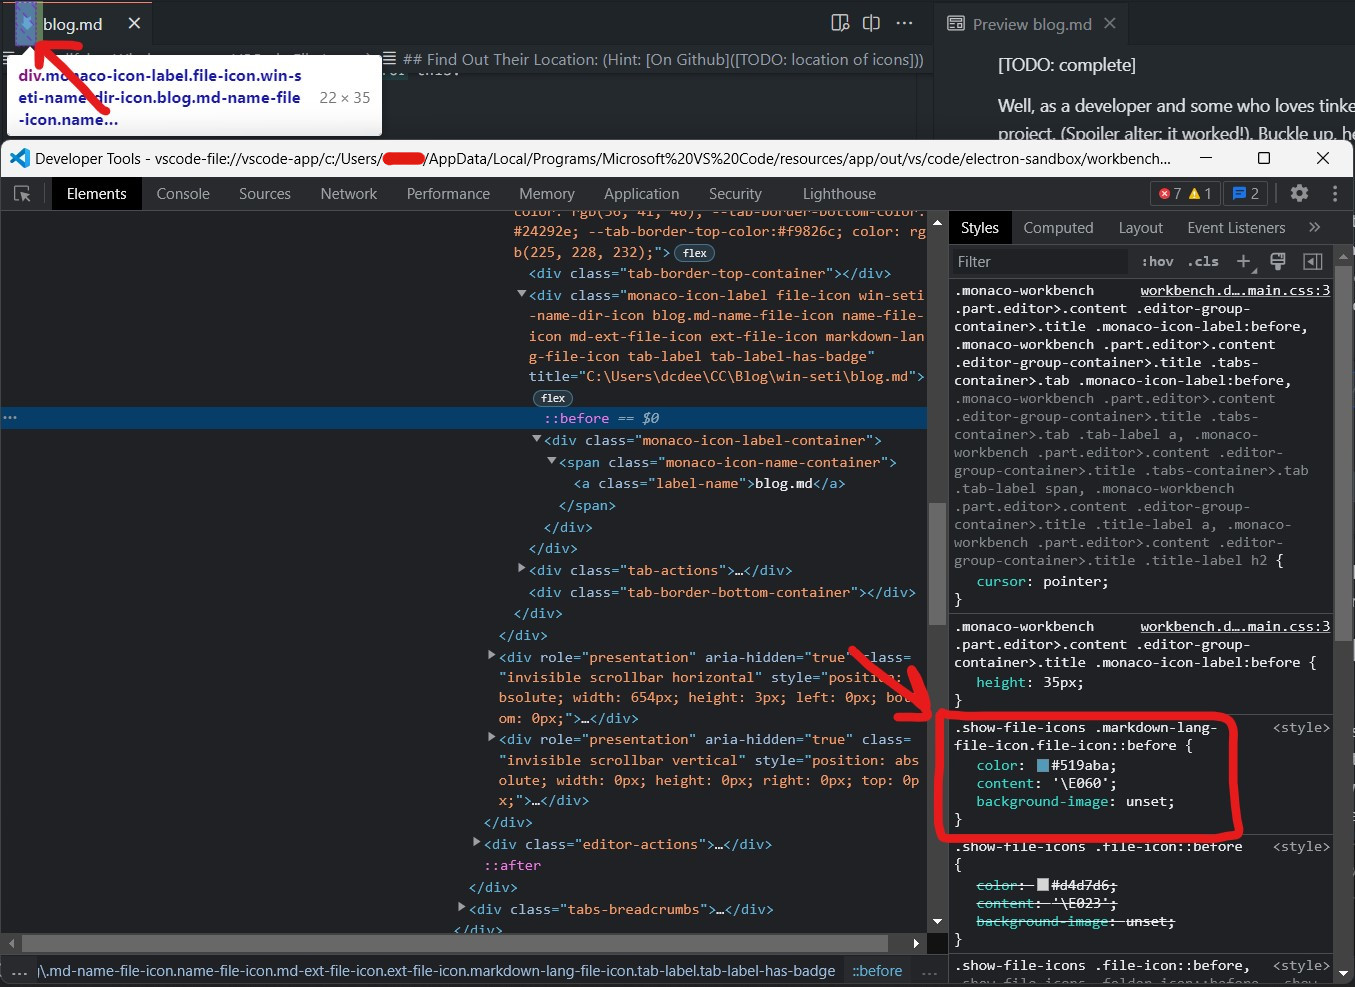
Oh, they’re stored as a font. The CSS says that the icon for .md files has a code point of 0xE060 (in the font), and it’s displayed in blue, exactly as it appears in the editor tab.
This complicates things a little. Font icons means that we’ll need to:
- Find the font
- Find the code points for each icon
- Find the color values for each file type
- Somehow make icon files (.ico) for each of those icons.
just to get the icons, before another “phase” to integrate them into Windows. Alright. No big deal. :)
Evidently, VSCode didn’t always use Seti icons. Previously there used to be a different set of icons, which VSCode swapped out in an update for Seti, which was the icon theme used in the now discontinued editor Atom. The “icons” are divided into multiple Less styles: one for the file mapping, one for the color values, and one for the icon glyphs.
Aggregating the Information
Converting these to icons would entail collecting the values in a single object specifying all the necessary information and using that for the generation. Fortunately, there already is such a file, but in VSCode’s repository. vs-seti-icon-theme.json contains information from those three files aggregated into a single object. Sweet! This simplifies steps (2) and (3) above. Sitting in the same directory is seti.woff, completing step (1). There is also a handy preview.html to read the JSON and preview all icons.
A small issue is that this JSON is outdated, at the time of writing and likely at the time of your reading too. You can test that by seeing whether or not the extension .m is associated with an icon. If not, the file is outdated, still using .objective-c and .objective-cpp for Objective-C files. The fix is pretty simple though; the contributors have provided an update script to read values from those .less files and re-generate the JSON, as documented here:
> node build\update-icon-theme.js

Reading from https://raw.githubusercontent.com/jesseweed/seti-ui/master/styles/_fonts/seti.less
skipping icon def for jsonc: no icon for json defined
skipping icon def for postcss: no icon for css defined
skipping icon def for django-html: no icon for html defined
skipping icon def for blade: no icon for php defined
written ./icons/vs-seti-icon-theme.json
updated ./cgmanifest.json
...
We now have an up-to-date JSON, basically completing steps 1-3. Now to use this data to produce those icons.
If you do this yourself, make sure to (1) set FROM_DISK to false in the update script, otherwise it will try to find the necessary files locally, bombarding you with file not found errors, and (2) have no icons/vs-seti-icon-theme.json or the script will freeze.
Generating Icons
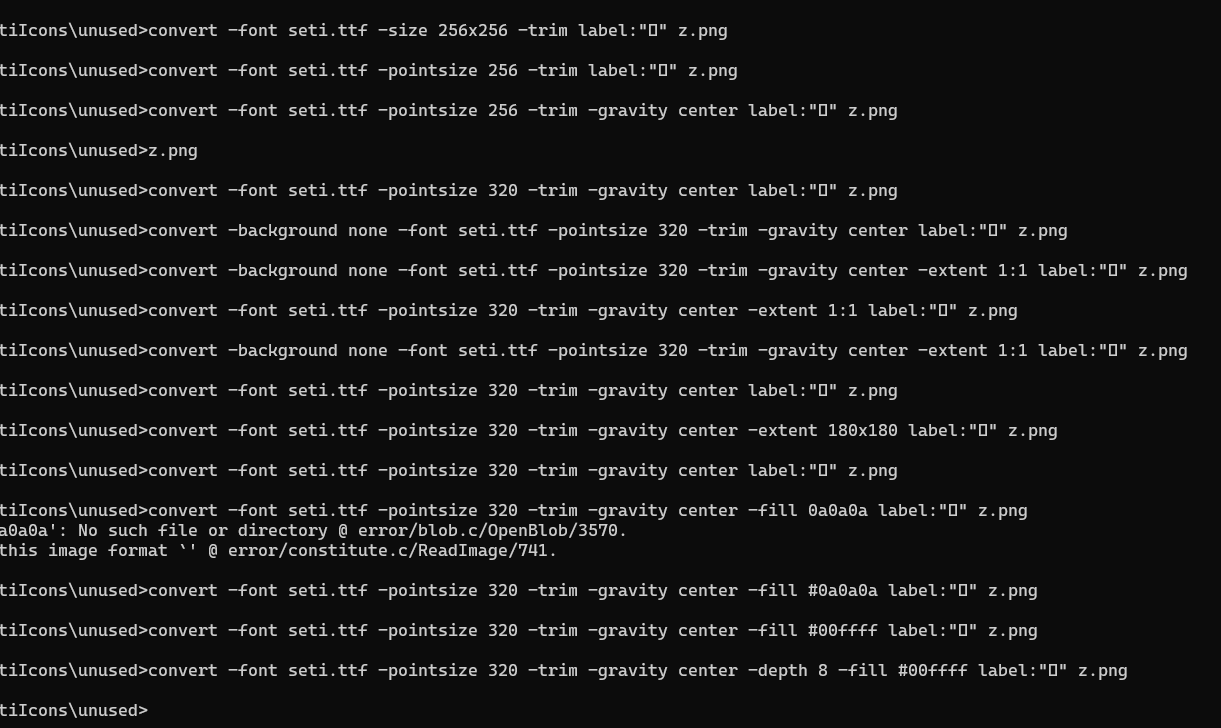
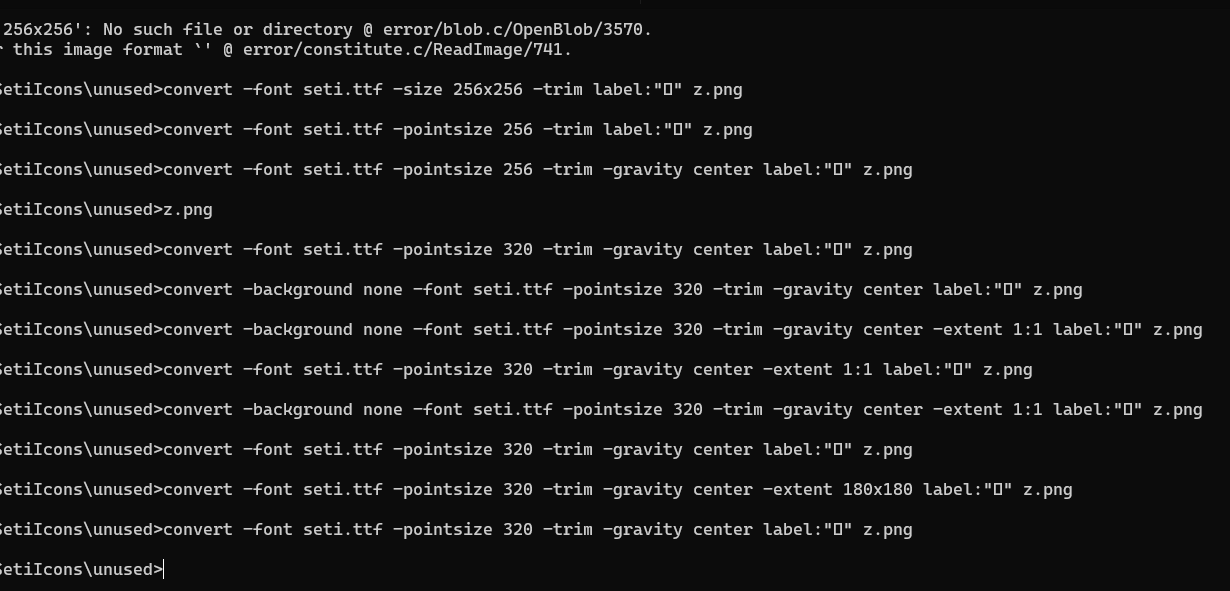
This was the second most complex process in the whole project (first was integrating them into Windows). My first attempt was to display them on a webpage and take a screenshot of the element. Another was to use Python Imaging Library (PIL). Yet another was to create a custom window and display the character in it and take a snapshot. In the end, I settled for using ImageMagick to generate an image containing a single-character piece of text in the specified font, essentially “converting” that character to an image.
convert -font seti.ttf -trim -gravity center -background none -pointsize 280 -extent 256x256 -fill <color> label:<char>, <outFile>";
where:
-pointsize 280sets the font size-extent 256x256sets the output image dimensions-fill <color>specifies the font colorlabel:<char>specifies the character to display
For example, this outputs a 256x256 image out.png containing a red “z” using the Seti font in the center:
convert -font seti.ttf -trim -gravity center -background none -pointsize 280 -extent 256x256 -fill #FF0000 label:z, out.png";
The command line you see above is a result of a lot of trial and error (trust me), mainly stemming from this thing called “font size”. Tell me. What actually is font size? What does a font size of 72 mean? Pixels between baseline and x-line? No that’s x height. Units between ascender line and descender line? No that’s body height. There are about a dozen different relevant words, and an interesting rabbit hole to go down into. But in simple words, font size is a fuzzy measurement of a character’s M-box (even that’s not exactly true). So it’s best to not think of what a number like 72 actually means, just that it’s bigger than 70 and smaller than 74; there is no “box” (no, not even the M-box) that contains a characters and is measured. The issue was remediated in part by using -trim and -extent and finding a good enough font size by trial and error.
These PNGs still need to be converted into ICOs. There are mixed suggestions about the sizes of the icons in a single .ico, but following a sensible approach I decided to use sizes 16, 32, 48, and 256.
convert -background transparent <pngFile> -define icon:auto-resize=16,32,48,256 <icoFile>
and repeat for each icon.
The Windows Side of Things
With the icons ready, it’s time to move to the other side of things. Given the icon resources, how do we integrate them into Windows? If you foresaw some registry gymnastics, that is correct, but it’s a bit more complicated than that. Learning about all the edge cases was so frustrating that I left the project altogether, taking a break for weeks because I thought it’s just not possible with all the caveats and undocumented exceptions. What follows is information I learned after weeks of trial and error. I suppose I should’ve expected it considering I’m dealing with a Microsoft product.
File Association: A Primer
If you already know how file association and the registry come together to make Windows work, don’t skip this section. Read it anyway. I’m sure you’ll find something you didn’t know about. All this information has been derived and tried and tested from the pages in this section, manual trials and a dozen other blogs and forums. Assuming you know the basics of Registry, here’s a rundown of what I learned.
Almost all file association information is stored in HKEY_CLASSES_ROOT, which itself is formed by merging information from multiple sources, as mentioned here and extended here. For simplicity during my testing, I modified HKCR directly; don’t do that. There is some additional information specific to File Explorer stored in HKCU\Software\Microsoft\Windows\CurrentVersion\Explorer\FileExts and is used to override the equivalent information in HKCR. Should be easy to understand considering both seemingly follow the same format.
There is a key for each extension in HKCR which acts as a starting point. The default value of this subkey has a ProgID (a unique ID for your program) as data, associating it with the extension.
A caveat already. As a consequence of this, it is possible (and was the case for me) that the ProgID in the default value is invalid. It can happen if you install an app that modifies the file association information for an extension and later uninstall it. Uninstalling won’t necessarily change the default value of the extension subkey, making it invalid. This situation requires further action to find out the ProgID currently in use.
Every ProgID has a key named after it in HKCR which contains further information about that file type, including but not limited to: the file description in its default value, file icon in its DefaultIcon subkey, multiple verbs which dictate what actions you can perform on the files (e.g. Add to Playlist for music files) as subkeys, information on how to open these files in the shell\open subkey.
This extension-to-ProgID association, however, can be overridden in the FileExts key mentioned above. Whenever a user selects a default program for a file type using File Explorer, the choice is stored in FileExts, overriding what’s stored in HKCR. The affected extension gets its own subkey in FileExts, which contains a UserChoice key containing the ProgID of the chosen program along with a hash whose computation process is unknown. This hash makes things more difficult as we’ll see soon.
First, let’s see it all in action, using .c as the test extension. HKCR contains a subkey named .c:
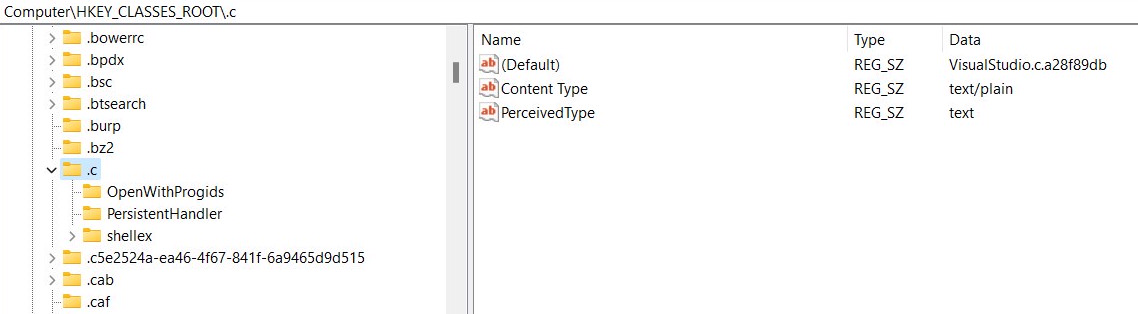
whose default value is the ProgID VisualStudio.c.a28f89db. HKCR then contains a key named VisualStudio.c.a28f89db:

whose default value gives us “C Source” as the file description. The file icon is set in its DefaultIcon subkey, whose default value contains the data "[...]Visual Studio\2022\Community\Common7\IDE\VC\vcpackages\VCProject.dll",3, which means the 3rd icon resource in VCProject.dll. Inspecting the DLL for its third icon [group] resource shows us:
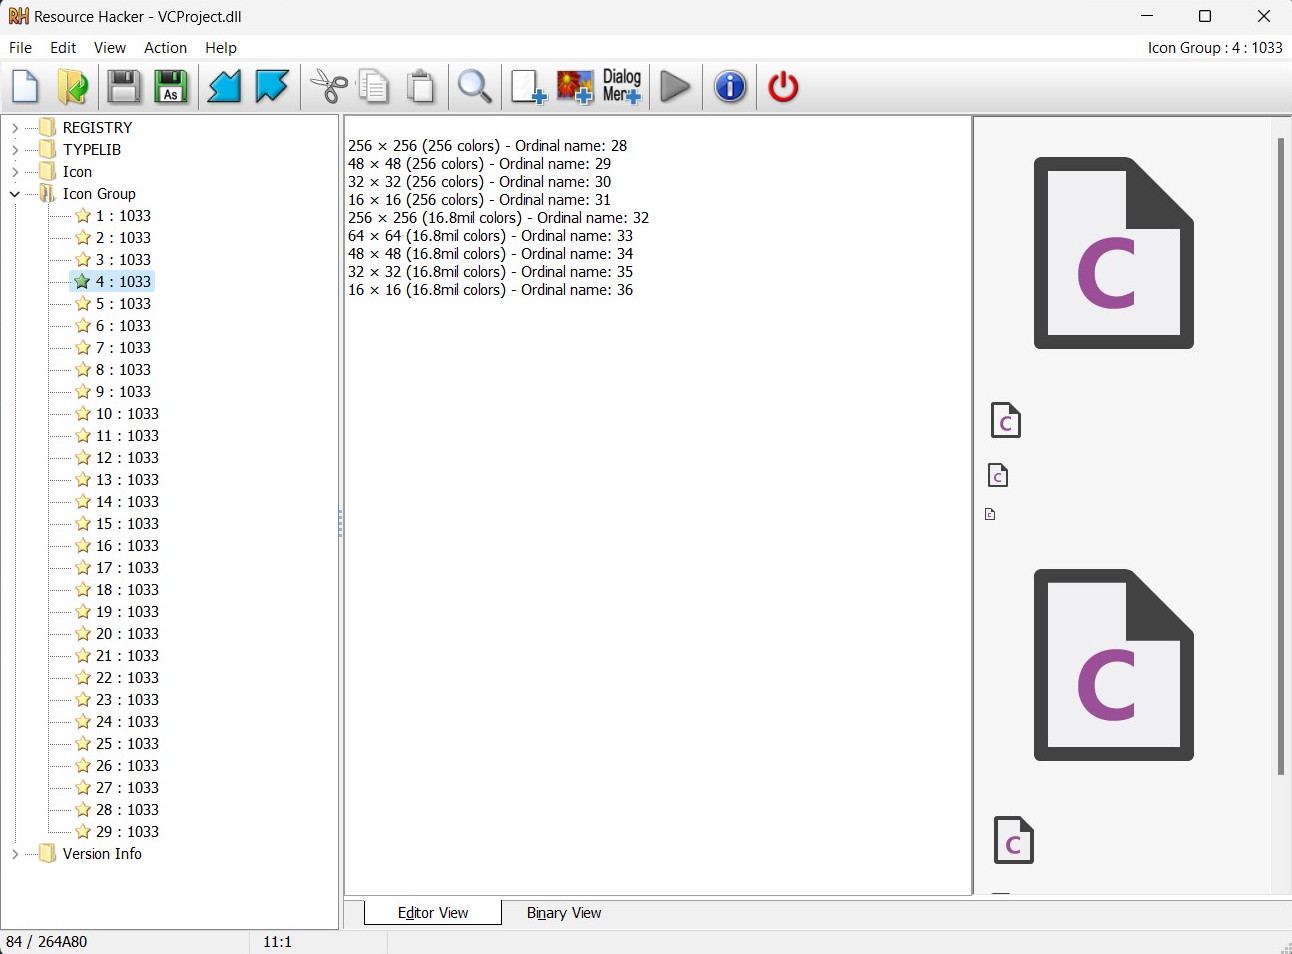
(Counting in Resource Hacker begins at 1, so the icon [group] is numbered 4. In the registry, counting begins at 0, so the number specified is 3.)
Collectively, it means that a .c file in my computer should have the icon we see above, with “C Source” as the file description (along with other information not relevant here). Let’s see if it matches.
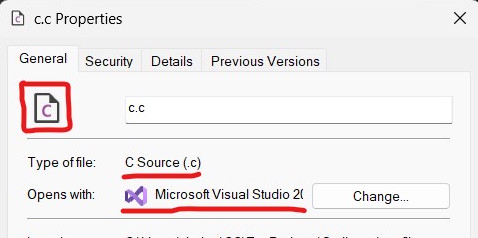
Sure enough, it does. This validates the information we already know about how all those keys and values work together.
Customizing File Types
Okay, after (hopefully) having figured out how it all works together, we need a way to modify the keys in a way that the file icon (and only the file icon) is changed. The first method that comes to mind is to figure out the ProgID of the extension we want to modify and change the icon in that ProgID’s key.
It seems questionable to change other programs’ keys; why not just create another ProgID and associate that with the extension? Because of a few problems, the biggest being the FileExts key. Because it contains a hash calculated with ProgID as one of its inputs, you can’t change it without invalidating the hash, and therefore the file association. You can’t create a new hash because the algorithm is unknown. Consequently, a new ProgID won’t work if the current extension-to-ProgID mapping is stored in FileExts rather than HKCR. I did try it though; no success.
So we have to follow the former approach, the first step of which is to find the current extension-to-ProgID mapping, which turned out to be another complexity. My first attempt was to manually read the FileExts and HKCR subkeys and merge the results, overriding information as necessary, before finding out that OpenWithProgIds also plays a role in finding the correct ProgID, which added another variable, and worse: the possibility for more. After some hunting, I found out about IQueryAssociations, a COM interface providing the exact information we need, along with its WIn32 API wrappers. The one we need is AssocQueryString, providing us with a lot of information about an extension, most importantly the associated ProgID.
Knowing the ProgID associated with the extension makes things simpler. If there is one associated, just backup and modify the DefaultIcon in that ProgID, otherwise create a new ProgID and associate it with the extension. Restoring is just deleting the generated ProgID keys and restoring the backed up DefaultIcons.
Putting It All Together
With all the necessary information gathered (finally!), it all just needs to be automated. The code itself is divided into two parts. A “generation” part, which reads the aggregate JSON generates the icons and an extension-to-icon-name map, and a “client side” part which takes the icons and map and modifies the registry to install/uninstall those icons (uninstalling just means reverting the icons to previous state). This way a normal user wouldn’t need to re-generate the icons & map, they can just download and use the pre-generated icons & map.
On a high level, installation is a 6-step process. For each extension to customize (“install”):
- Add extension and icon (read from the map) to model
- Query the ProgID associated with that extension
- If there isn’t one, create a new ProgID
- Create new
ProgIDkey - Map extension to ProgID by creating an extension key
- Create new
- Ensure the
DefaultIconsubkey exists in theProgIDkey - Backup any existing icon, if a backup doesn’t exist already
- Update the icon
where model is an internal representation, a list of objects where each object binds together an extension, its ProgID, and its icon name, written to a file at the end of installation. It’s necessary to make a backup only when one doesn’t exist already otherwise updating icons twice would result in losing the original icons forever (guess how I learned this ._.). The model is saved to a file to be used during uninstallation if needed.
The uninstallation (or restoration) itself is a simple process. For each installed icon (i.e. present in the model):
- Restore the previous
DefaultIcon - If its ProgID was generated by SetiIcons, delete it.
That’s it! Open File Explorer and feast your eyes. :)
Conclusion and Retrospect
Remember how I said that I left this project in frustration and came back weeks later? Well, when I did, I wasn’t as interested anymore. I’d soon started switching to.Linux full-time and this project never left my experimental projects folder, for a time duration that can be measured in years. I’m adding this last section as my late thoughts on this still-experimental project I call SetiIcons.
Documenting this process wasn’t a goal when I started, which, combined with the fact that SetiIcons never got a “release”, means that there is no good way for someone to just try this thing out. Windows has probably changed since the experiment so it’s not guaranteed to work well, if at all. Should you do decide to spend a weekend dabbling into it, I strongly suggest a VM or at least a full registry backup. You can now find all the code and scripts that made this possible in the repository, but don’t blame me if your eyes start bleeding looking at it; it’s experimental after all :). The code is a mess, there’s stuff in there that ended up never working, there’s no reasonable user interface, and the code that does work is now a mystery to both you and me alike. Maybe if life had been different and I had had the time and affordability to look further into undocumented behaviour for what was always a fun side project with no real world consequences, I might’ve fixed the code and published a working solution.
But for now, it’s a little messy; it’s an experiment. It turned out well when it was performed and it curbed my curiosity. I count that as reasonable success. I’m not saying SetiIcons is no longer possible; it is. It’s just that if you decide to go further with it, you’ll be on your own; good luck :).